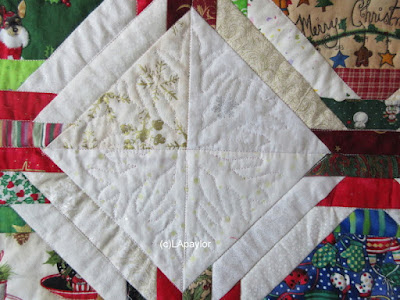
Finished and what a feeling of relief and accomplishment! It's big and heavy to me. I used to make lots of bed quilts both hand quilted and machine quilted but I'm older and parts of me are injured making this finish a wonderful feeling! I am calling it Christmas Ornaments for now but no label is made yet.
 |
| Milo: can I get on Mama?? (Mama: nope) |
piecing around them pineapple style with pretty holiday scraps, squaring them to 12.5" and arranging them on a design wall. When I saw how big it was, I decided to quilt it I'd have to design a way to quilt it in large sections, rejoining it after that.
This meant I could use lots of fabrics on the backing of each section, and I used a variety of preprinted block fabric, and others large enough to cover this territory. For a person who uses an aged Bernina 1630 with a small harp to do all her work, this took a lot of planning
 |
| looks small here but it is 72" X 72" and my harp opening is 6" |
 |
| some of the backing fabrics |
Apologies for the weird looking angles, this is larger than my design wall that sits propped up on 4 baskets, making the quilt buckle out at the bottom and look distorted
this process means planning which unit will have extra backing to use as a flap to sew over the quilted seams, sandwiching each section, carefully quilting each section first then machine stitching. Next carefully fold the planned flap over that seam after pressing, and hand stitching it closed....
which took much longer than it ever has before! But it looks good, almost invisible as you could see from the larger shot of the backingafter a couple sections were sewn to the big 9 block center section, I was able to free motion stitch snowflakes. I cut my own out of freezer paper to use as templates....
 |
| see the different white/cream fabrics used? |
Again, this was hard to photograph because of the size, but it hangs perfectly straight and even!
I chose a fun red and white strip, also used in the blocks, and had just enough for a binding, a 3/8" uneven strip left after it was done and dusted! I put the binding on the outside borders after quilting them but before attaching them to the other part.... then hand stitched the flap over the border seams, and joined the bindings.
 | |
| the floral is backing the border, and I pulled the floral fabric over to form the seam cover |
I wrote a list on Thursday's I Like post of art techniques I'd like to learn/do this year.... there is always something to learn or try.... for now I hope to cram some The Quilt Show videos in today before my membership runs out, then sort out the studio and plan some projects for the coming year.
linking with:
design wall Mondays at smallquiltsanddollquilts
lovelaughquilt.mondays


