Voila! The Halloween tote finished mere days before the holiday... well there's always next year too!
I have to work when I want to work and this wanted to be made. I already made a throw quilt with one concocted pattern, stenciled some sugar skulls, stamped some fabric for note cards (winging their way to some of you as we speak) and now an improve tote.
Lookie! My motto "USE IT!" is in play because I have had these skelli key rings hanging around for years!
I just slipped it on the handle! What fun! There's a yellow one on the other side.
Each time I make something I develop a new technique and this time it was a way to finish off the inside seams. It is so picture heavy I plan to do two posts on the making of this.
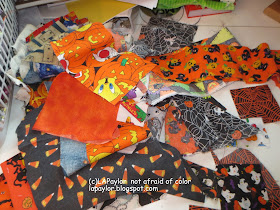
I started with left over scraps from doing the quilt (pattern and tutorial to follow in a few days)
That quilt was made from scraps from a quilt I made my friend Suze about 7 years ago. Heh heh
They must multiply.
So these really stale scraps became improv log cabins. I started with the icky candy fabric cutting it into various size squares. Then adding as I went, willy nilly, growing and growing til they were about 7" ish.
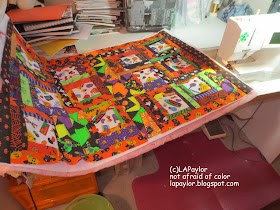
I had 12, and placed them on the wall. Decided where to add a bit, where to trim a bit so they would fit together into two main (front and back) sections for a tote.
then I sewed them together and added a little accent strip for the top of the bag.
I'm loving it at this stage, and wondering how it'll look in 3-D. Decided to add in side strips so when the bottom was boxed in, it would keep the log cabins mostly to the front.
Next step is to add in a strip that will be the bottom of the bag, sewing it to the two sections in order to layer and quilt. I use peltex instead of batting in my totes. It quilts great, the totes have body, but it's a mess to gather through the machine sometimes.Doesn't want to bend. I broke two needles. shrug.
I quilt it as usual, and usually do an envelop turn to finish off the side seams. I didn't want to this time. so I came up with a way to finish the inside side seams. That's tomorrow.
I'll tell you about the couching, side seams, handles, and boxing the bottom all in this post:
the link is click here
Sewing is fun Y'all.
I know someone will ask if I made this! They always do, and I think of course, where on earth would you find this kind of nonsense?


Love it! Hoping you'll do a review of you Halloween series.
ReplyDeleteHi LeeAnna,
ReplyDeleteA great idea to show off/celebrate each season, holiday and fun days! Say yes with pride if someone asks! And show off the high lights!
Oh, my! I always want to make a pretty tote. Yours is so cute with the skeleton dangle. All the fabrics and special bits make this a darling finish. Congratulations.
ReplyDeleteThis is so you! How do you store all your fabric - color? Theme? Season? You must have a sizable stash
ReplyDeleteGreat bag! The first thing I noticed was the skelly key chain, so appropriate! I sure wish I knew you back when my kids kept telling me I had too much stuff and then when I moved I had to find new homes for a lot of it...I would have had some cute embellishment stuff like you have. I could have showed them your blog and they would have known there IS a sane reason for people to keep things like that!!!
ReplyDeleteWild scrappy goodness! Thanks for linking to Finished or Not Friday.
ReplyDeleteWhat a great tote. Love the colors. ღ
ReplyDeleteWell, I love this kind of nonsense lol. It looks great! Congrats on this finish and bonus points for making it before the dead line. ;^)
ReplyDeleteThis is my kind of nonsense!
ReplyDeleteI love your scrappy tote bag!!
ReplyDeleteWhat a good idea for using scraps. I'm looking forward to reading the next instalment.
ReplyDeleteIt must have every color of the rainbow plus a good helping of black. It will really stand out in a crowd, no chance of losing it. Great construction job!
ReplyDeleteYou have more fun with making things than anyone I know! Love this skelli-decked tote! 8)
ReplyDeleteThanks for sharing this great project and for sharing the steps to make it!
ReplyDeleteHow fun!! It will be good this year and next and for many, many Halloweens.
ReplyDeleteIt's really cute, and perfect for this time of the year! Thank you for sharing at The Really Crafty Link Party. Pinned!
ReplyDelete